- Log in as an Administrator and select the IMPORTS/EXPORTS tab, located to the right of the Users tab.
- On the Imports tab (which appears in blue text on the right side by default) select Import CSV.
- In the dialog box that appears, use the drop-down lists to select the following
Box 1: Version 2, Box 2: Schedule and Box 3: Create.
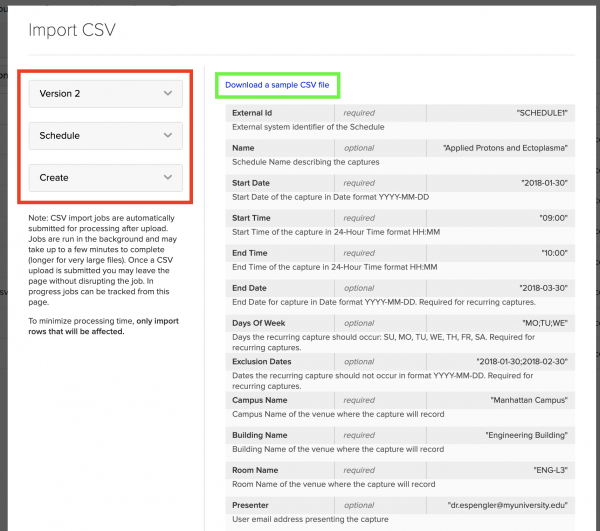
- Select “Download a Sample CSV file” at the top of the window (shown in green above) to receive the template file
- Once downloaded, open the file as a CSV or Excel file (to open as an Excel file, right click the file and select “Open With” excel)
- Fill in the cells with the details of each scheduled recording- each row indicates a new session. You can delete columns if you do not have all of the information.
- When finished filling in the file, save the file as a CSV and return to the Echo360 page.
- Click Upload CSV.
- In the window that appears, navigate to and select the CSV file you just saved.
- Once the upload is finished, the file appears in the list of Imported files along with a status. Use the refresh button to update the table if necessary.