Who Can Backup & Restore Courses
Only those with course coordinator permissions (or higher) at the VSTAR Learn site level can backup and restore courses. If you are unsure whether or not you have these permissions, or unsure whether you need to perform the actions outlined here, please submit a support ticket
What Do We Mean By “Copying?”
This is actually two distinct actions – a course “backup” function and a course “restore” function. Courses are backed up automatically every week by the Education Informatics team, so the only time you really need to perform these actions is when you are moving a course from a section that’s getting ready to finish to the section that will be starting.
Backup
Note: Before you begin, find your new course. Verify the number of topics in the course you are backing up, and add topics to the new course to make sure that the new course has the same number of topics as the old course. You can recover topics later if you miss anything, but this will help with making sure your old course and your new course are an exact match from the beginning.
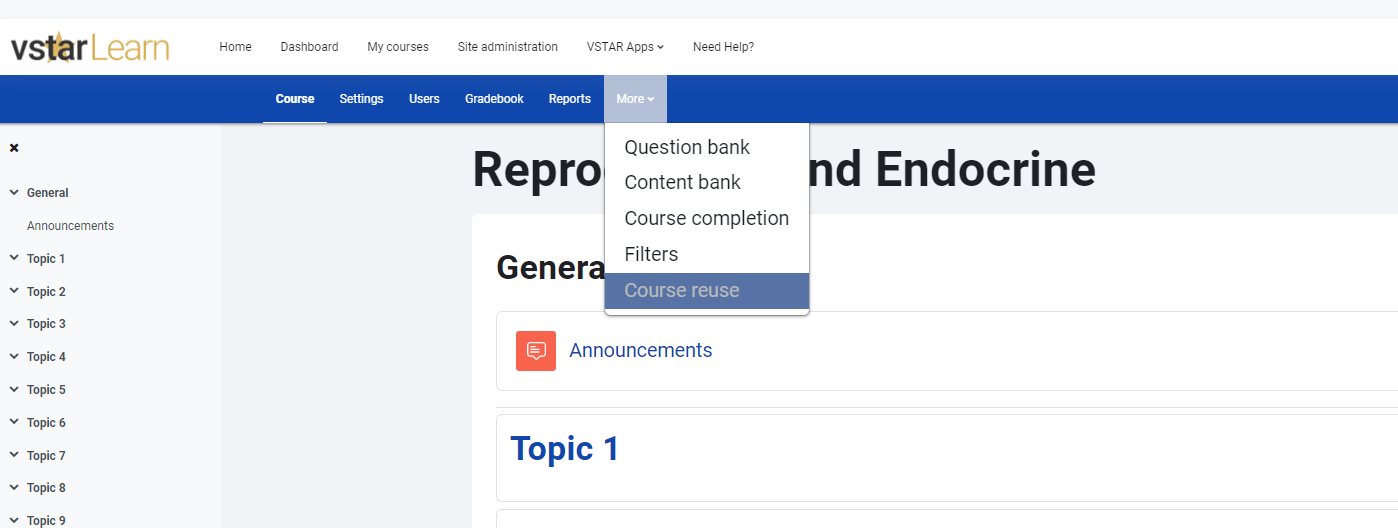
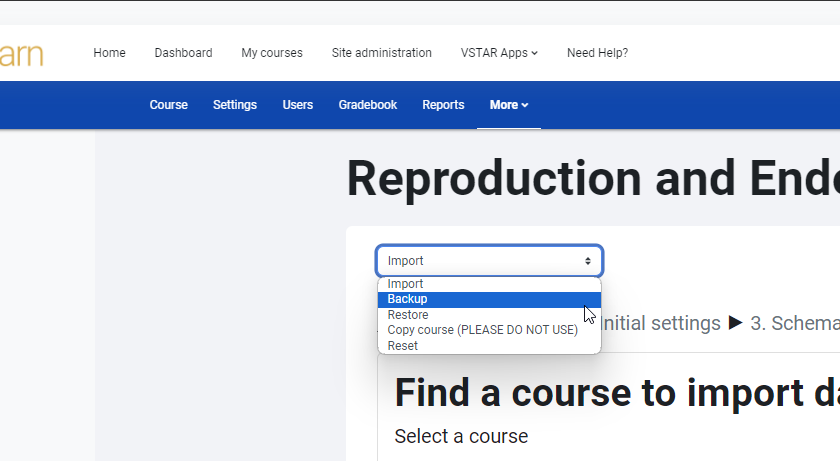
1. To begin the backup process, go to the course you wish to back up, select the More tab and click Course reuse:
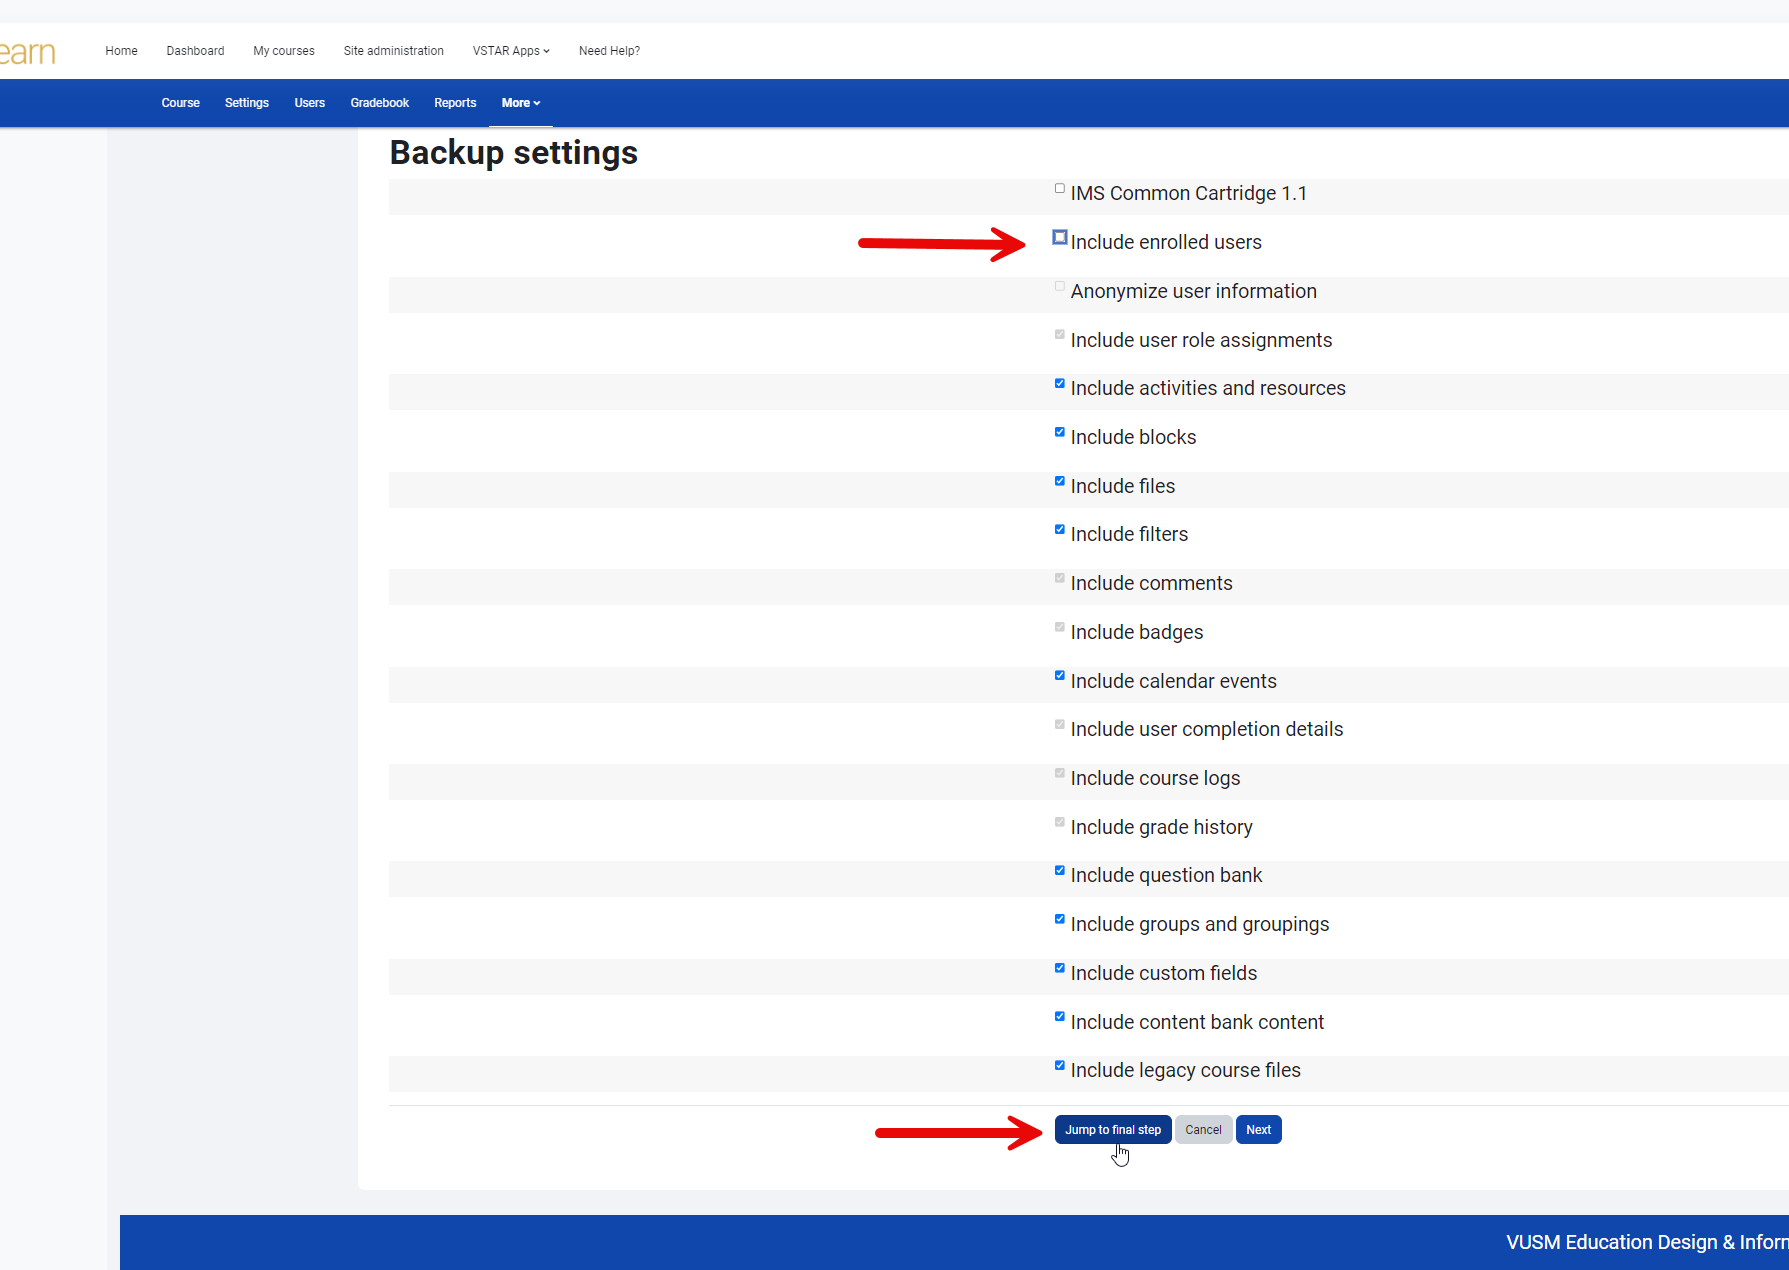
3. The next step will be important: deselect “include enrolled users”. We only want the next section’s enrolled users to show in our next iteration of the course. From there, you can jump to the final step.
4. After the course has finished Backing up, press Continue.
Restore
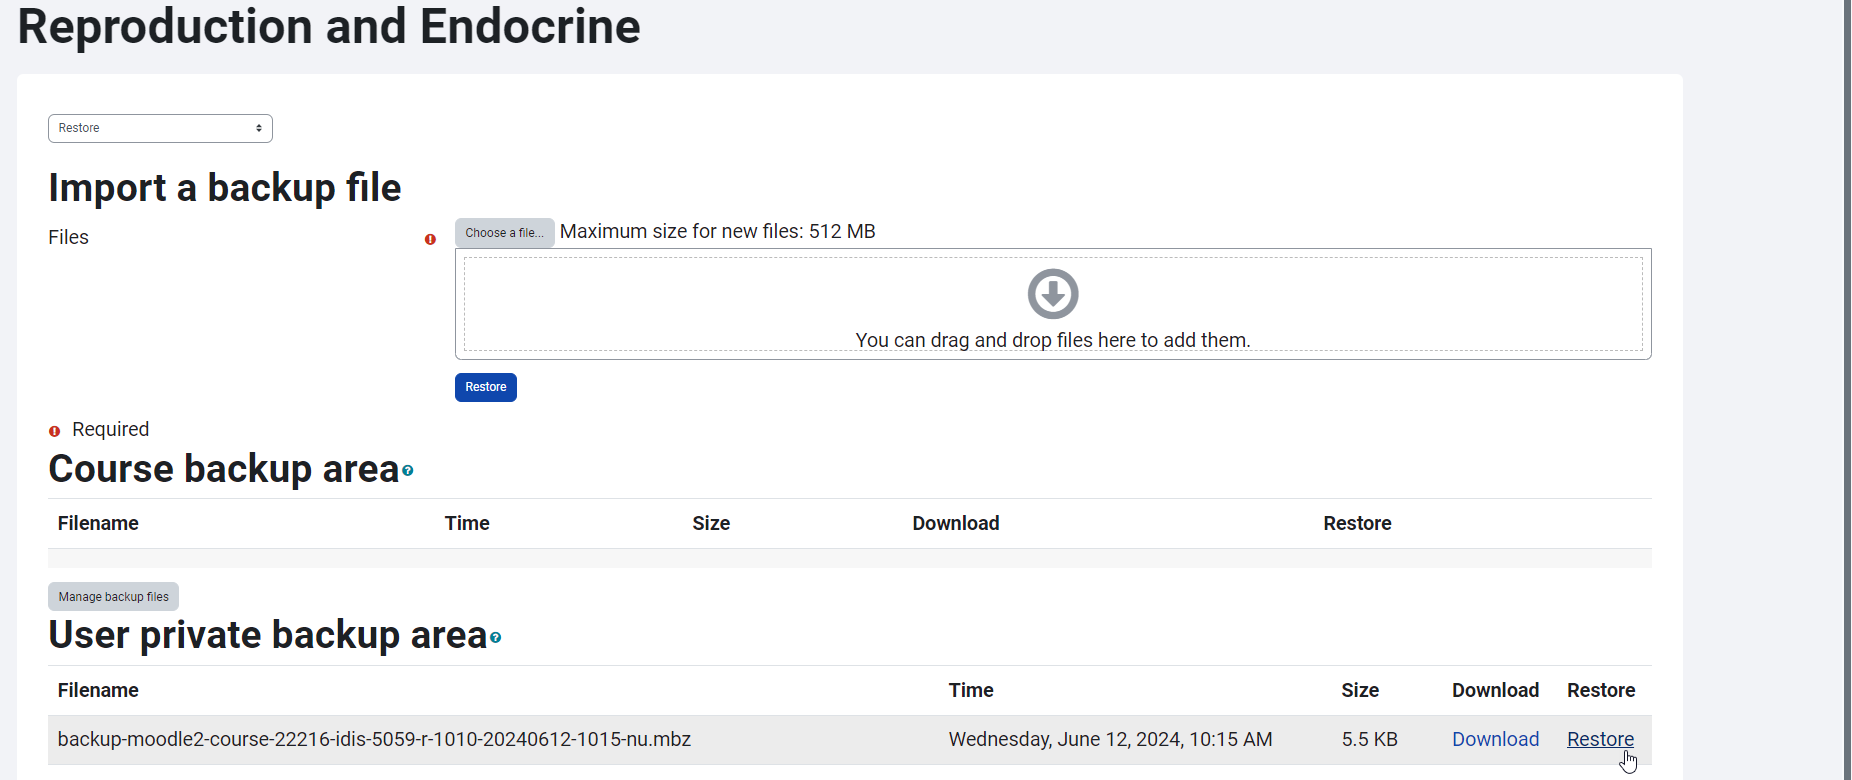
5. The next step is to restore the course into the new shell. Click Restore next to the course you just backed up:
6. Click Continue on the confirmation page
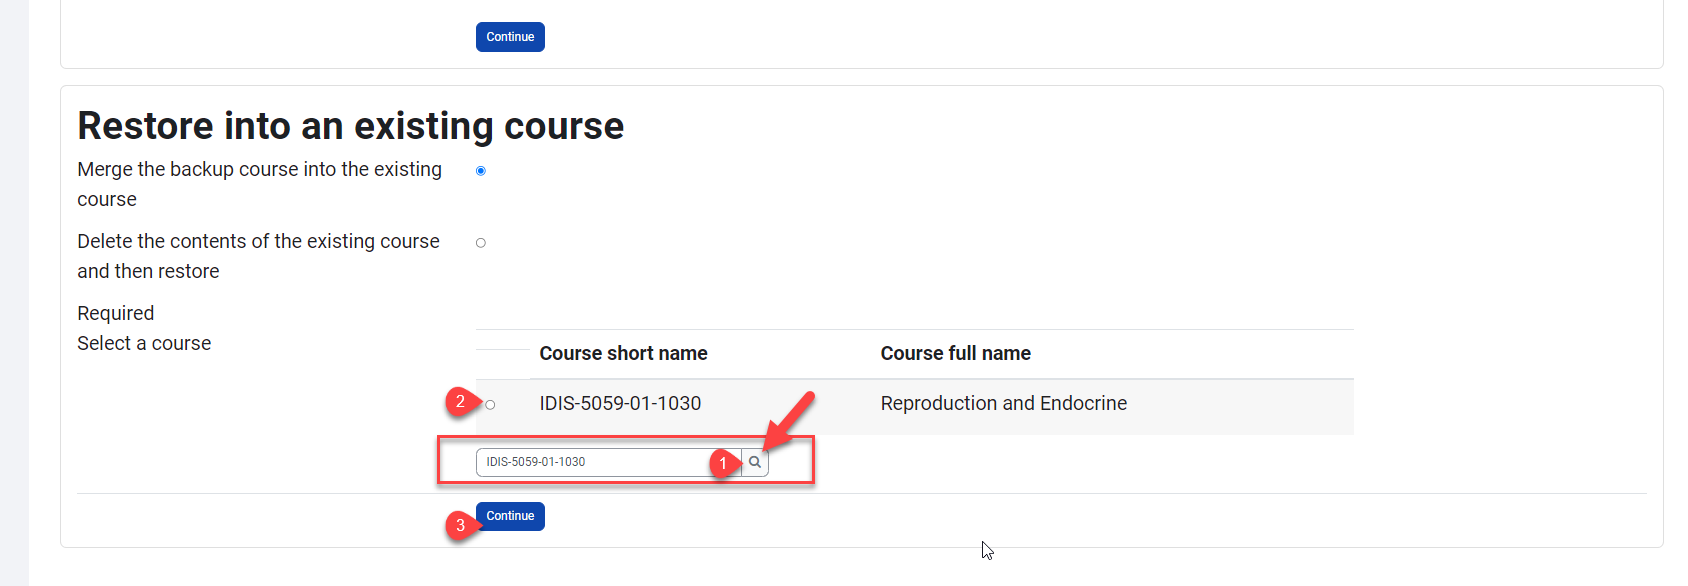
7. The next step is to choose the course we want to restore into. Scroll to the bottom of the destination section under “Restore into an existing Course” to search for the course code shell:
8. Click Next on the Schema page to confirm content selection.
9. Click Perform Restore on the Review page
The upload process may take some time. You can do other things while VSTAR is working, but do not navigate away from this page.
10. Complete
You will see the completion screen when the restore is finished. Click the “continue” button to navigate to your newly restored course.
All students and faculty should be enrolled automatically into the course if you’ve entered the correct course short name.