As a Curriculum Admin, you will be able to upload Course Objectives and Course Type Objectives in bulk. This means that you can add as many Course Objectives or Course Type Objectives in as many courses as you want.
We will start with Bulk Uploads for Course Objectives.
Course Objectives
Select the Curriculum dropdown item in the Left Navigation menu. From their select the Learning Network dropdown item.
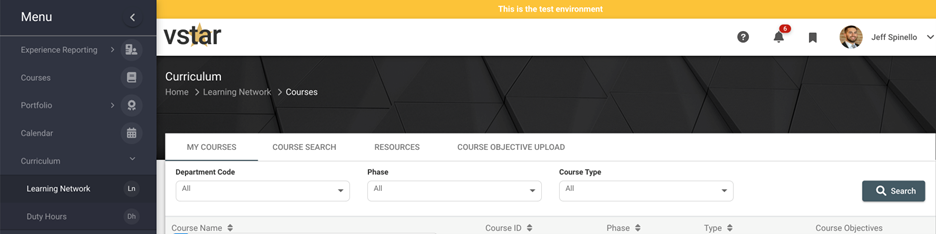
From here you will see a tab in the Learning Network called Course Objective Upload.
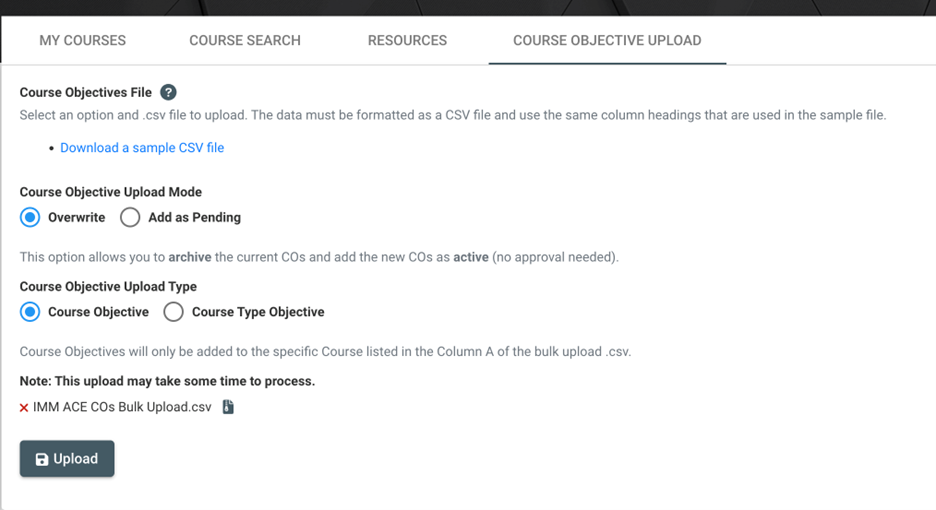
Download the sample CSV file. The file will contain 24 columns.
Column A: Course ID
- You must enter the Department-catalog number (aka IDIS-5020). The dash in between the Department and catalog number is required
- You can add as many Course IDs in the subsequent rows as you would like
Column B: AY
- You must enter the AY as yy-yy (aka 23-24) even though the column title is AY yyyy-yyyy
Column C: Effective On
- If in Column B you enter the current AY, then Effective On is required and must be at least 24 hours from when you upload the file. The format is mm/dd/yy
- Effective On indicates when this Course Objective should be an active
Column D: Course Objective
- Enter your Course Objective text
- Please by aware that bullet points and numbered or alphabetical lists will not translate in the upload process. It is recommended to edit the formatting of the Course Objective text in the UI once it has been uploaded into Next
Columns E-X: MEPOs
- If the corresponding MEPO should exist on the Course Objective then type TRUE into the cell
- TRUE or FALSE must be present in all cells and at least one TRUE must be present in every row
Once you have finished creating your Course Objective Bulk Upload File, then you will save it as a .CSV file.
From there, in the Course Objective Upload Mode question you will select “Overwrite” and in the Course Objective Upload Type you will select “Course Objective”.
The final step is to attach your file by selecting it in the last question and selecting Upload.
If there are any errors on the file, an error message will appear with the suggested changes.
Course Type Objectives
Course Type Objectives will apply to all Courses with the corresponding Course Types:
- ACE: Advanced Clinical Experience
- AE: Advance Elective
- AI: Acting Internship
- CC: Core Clerkship
- CCE: Core Clerkship Elective
- FHD: Foundations of Health Care Delivery
- FSC: Foundational Science Course
- ISC: Integrated Science Course
- LC: Learning Communities
- MIDP: Medical Innovators Development Program
- RES: Research Longitudinal
Column A: Course ID
- You must enter “IF-{Abbr Course Type}”. For example IF-ACE. This will let VSTAR Next know that you are creating a Course Type Objective
- You can add as many Course IDs in the subsequent rows as you would like
Column B: AY
- You must enter the AY as yy-yy (aka 23-24) even though the column title is AY yyyy-yyyy
Column C: Effective On
- If in Column B you enter the current AY, then Effective On is required and must be at least 24 hours from when you upload the file. The format is mm/dd/yy
- Effective On indicates when this Course Objective should be an active
Column D: Course Objective
- Enter your Course Objective text
- Please by aware that bullet points and numbered or alphabetical lists will not translate in the upload process. It is recommended to edit the formatting of the Course Objective text in the UI once it has been uploaded into Next
Columns E-X: MEPOs
- If the corresponding MEPO should exist on the Course Objective then type TRUE into the cell
- TRUE or FALSE must be present in all cells and at least one TRUE must be present in every row
Once you have finished creating your Course Objective Bulk Upload File, then you will save it as a .CSV file.
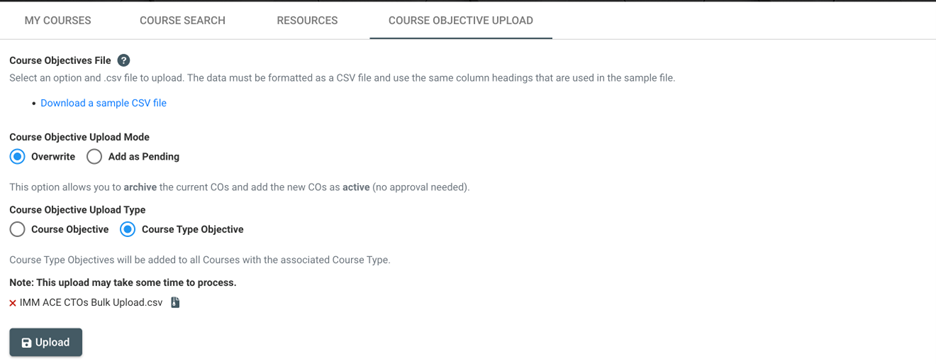
From there, in the Course Objective Upload Mode question you will select “Overwrite” and in the Course Objective Upload Type you will select “Course Type Objective”.
The final step is to attach your file by selecting it in the last question and selecting Upload.