This help article will walk students through the steps needed to submit their Vital Experiences. Vitals can be found within VSTAR Next, from the Apps dropdown in the top right corner. You can also use the following link to open VSTAR Next directly.
This workflow can be found from the “Add Vital Experience” page in the Experience Reporting menu in the left-hand navigation panel of your computer’s browser, or from the hamburger menu in your mobile browser.
- Experience Details
- Experience Date
- Associate Course (select this first to get a list of course start/end dates)
- Experience Type and Item
- Experience Comments
- Comments (optional)
- Do not include PHI
- Learning Context
- Setting
- Patient Experience
- Location
- Responsibility
- Patient Context
- Age
- Special Population (optional)
Tip: This workflow will outline how to create an experience submission from the beginning, however, you can also duplicate a previously submitted experience and update individual experience details if a single experience consisted of multiple skills or procedures.
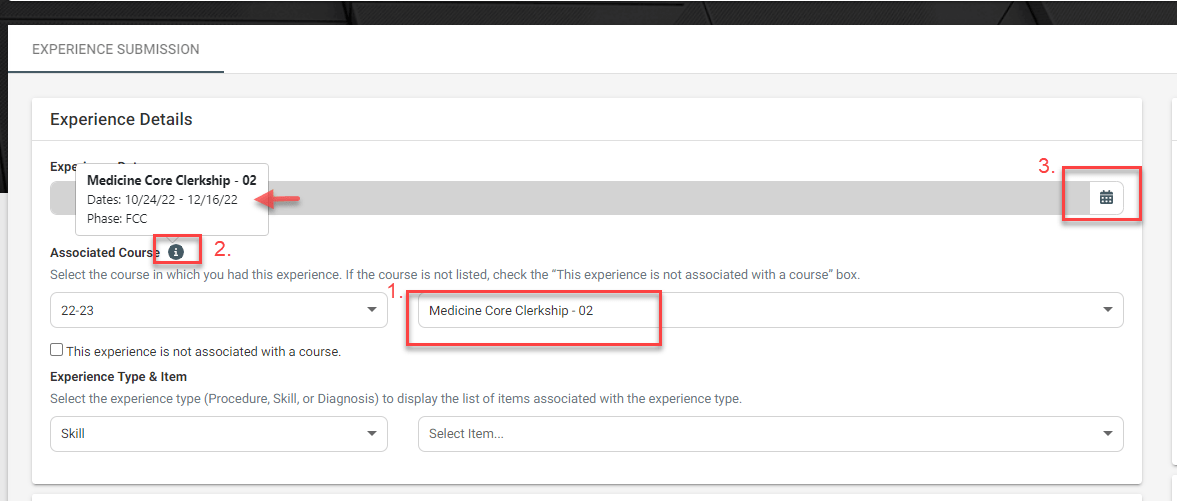
1. Experience Details
- Experience Date: Select the Calendar icon and choose the date of your experience
- If associating the experience with a course, the experience date must be within the course start and end dates.
- Associated Course: Select the academic year and the course associated with your experience.
- If the experience is not associated with a course, select the check box below the Academic Year selection box and note the course or volunteer activity associated with the experience in the text box
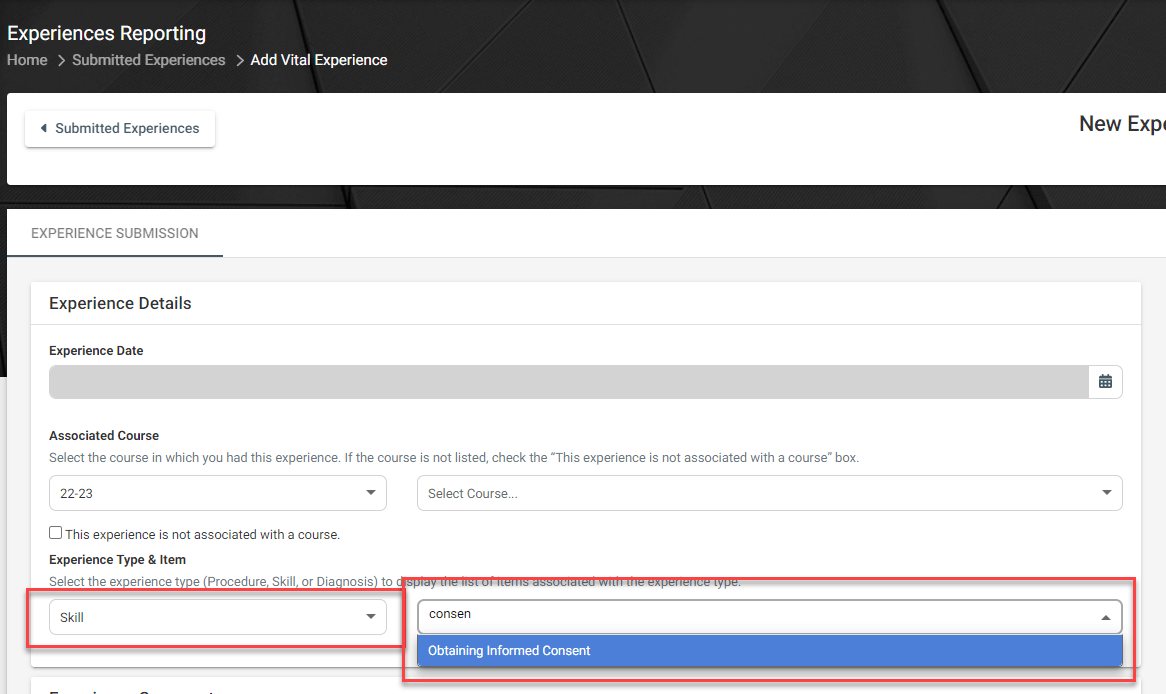
- Experience Type and Item: Select the experience type followed by the specific experience item
Tip: Once selecting a course, a help icon appears that provides the dates of the course.
Tip: Start typing in the Experience Item box to find your experience item faster.
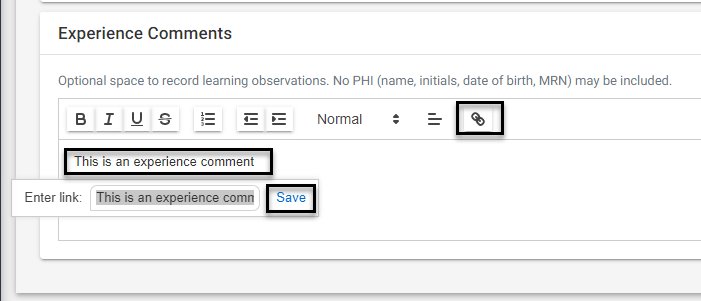
2. Experience Comments
Optional: Without including any protected health information, this text box can be used to document learning observations from the experience
Tip: To create a link, type the text in the text box, highlight or select the text, and then click the link icon to add the URL.
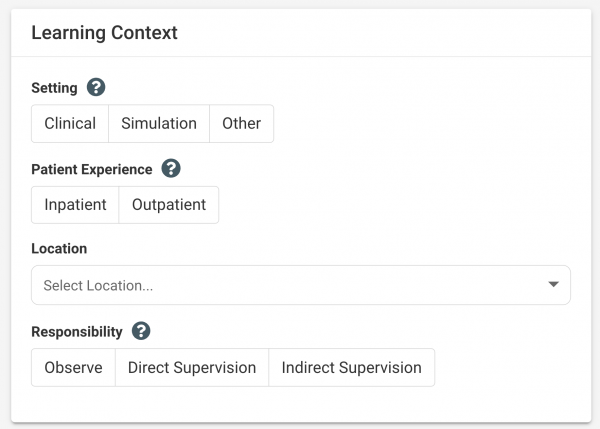
3. Learning Context
- Select the Setting type
- If “Other” is selected, a text box appears for students to add more information.
- Select the Patient Experience context
- Select the Location of the experience
- Select your level of Responsibility for the experience
Tip: The help icon provides more information
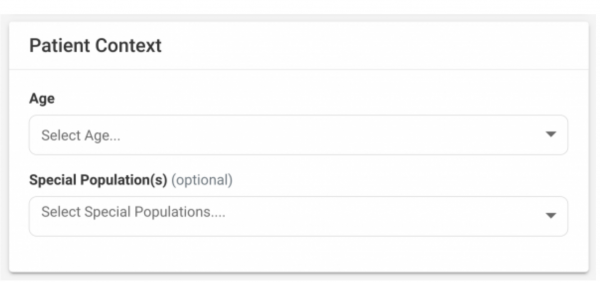
4. Patient Context
- Select the Age of the Patient
- Optional: Select any of the Special Populations the patient belongs to
5. Save Experience
- Select the Save button in the top (or bottom right for mobile) of the screen to record your experience details
Available Next Steps:
- Duplicate Experience – Select the Duplicate button to copy your saved experience and add more details for the same experience (read more)
- Edit Experience- Select the Edit button in the top right corner of the experience to edit details (read more)
- View Submitted Experiences – From the left-hand menu, expand the Experience Reporting dropdown and select Submitted Experiences (read more)
- Add Another Vitals Experience – Select the Experience Reporting dropdown menu on the left, followed by “Add Vital Experience”
- View Your Experience Map – Select the Experience Reporting dropdown menu on the left, followed by “Experiences Map” (read more)